Much like many other natural hair tips and advice, how to wash natural hair isn’t one-size-fits-all. That means there isn’t a singular answer when someone asks, “How often should you wash your hair?” In all honesty, the frequency of your wash days depends on your shampoo, personal preference, and the state of your natural hair. With that said, there’s a strong chance that you should be cleansing more often than you have been—or at least think you should be.
It’s very common and understandable to have hesitancy about overwashing natural hair. It’s the driest of the bunch, which makes it a lot more prone to damage, breakage, and curl pattern changes. However, there’s one big takeaway that those with natural hair need to remember: Water is your friend. It’s all about balance, and with the right hair care products and hair washing routine, you can absolutely make the most of each wash day. Here’s what you need to know.
How Often Should You Wash Natural Hair?
Although there isn’t an exact science to figuring out how often you should wash your hair, since it depends on a few factors. To determine how often you should wash your hair, consider how much product and the types of products you’re using on a regular basis.
Wash your hair once a week if … your hair requires heavier oils, gels that might flake after a few days, or hairsprays that leave hair stiff. This also may be what’s needed if you have an oily scalp. Piling product on top of the natural oils that your scalp produces, particularly if it’s in excess, can not only clog the hair follicle but also might lead to irritation, inflammation, itching, and in more severe cases, follicle damage or hair loss.
Wash your hair twice a month if … you add heat to style your hair with a diffuser to dry, a curling wand to define, or even if you blow dry your hair straight on a regular basis. When you add heat to style your hair, cutting the wash frequency back to every other week can be beneficial. Even if you’re using a heat protectant (which you absolutely should be), there may be some level of moisture stripping happening. When you do shampoo, use a moisture-boosting shampoo to help bring back any lost hydration.
Wash your hair once a month if … your hair is drier or if your scalp is more on the normal to dry side. Once a month shampooing will likely be an ideal step for you. Of course, you can always adjust if in between washes you’re feeling itchy or if you work out often and sweat a lot. Otherwise, weekly shampoos may better suit your active lifestyle to keep hair feeling and smelling fresh.
Should You Shampoo Natural Hair?
Contrary to popular opinion, natural hair needs shampoo. A lot of naturals are die-hard co-wash fans, and this is totally fine. However, a traditional shampoo is highly needed to help remove excess oil and product buildup, something a cleansing conditioner isn’t designed to do.
What Should You Use To Wash Natural Hair?
No matter your hair type, curl pattern, or the current state of your hair, what’s most important is the type of hair shampoo you use. Sulfate-free shampoo is key as it will give your hair and scalp the necessary cleansing to keep it strong and growing, without stripping any natural oils.
How Should You Wash Your Hair?
This may seem unnecessary, but there’s actually a method to washing, especially if you’re shampooing natural hair. This will ensure that you keep your hair from getting damaged and help eliminate frizz when you get to styling. Here are our hair washing tips.
Step 1: Check your water temps. Much like skin, hot water can dry hair out. Yes, we know it feels luxurious to run hot water through your hair, but the heat can strip your hair of essential oils. Wash with lukewarm or room temperature water instead, and finish with a cool rinse.
Step 2: Portion out the shampoo. Have you ever wondered, “How much shampoo should I use for my hair?” Well, let me tell you: You shouldn’t just squeeze a sizeable amount of product onto your locks and hope for the best. Pour shampoo into the palm of your hands and not directly onto hair. This will ensure that you’re doling out the right amount and not overdoing it.
It’s better to start with a smaller amount of product (about a golf-ball-size) through your hair and add more if needed, rather than to douse your head with it. It’s unnecessary. Shampoo should primarily be applied on your scalp and not the length of your hair (more on that in a minute), if you’re used to coating every inch of your strands, you may be accustomed to washing with way too much of your favorite hair shampoo.
Want to know what’s also unnecessary? That whole lather, rinse, repeat deal. We’ve already gone over that you likely don’t need to wash your hair more than once a week—you definitely don’t need to lather up multiple times during the same shower.
Step 3: Work through your scalp. Start by massaging the shampoo into your roots. You want most of the product to be concentrated on the scalp as that’s where the majority of buildup, dirt, and oil usually sits. Work the product around the scalp in a back and forth motion. Not in circles! This will tangle your hair and make it more difficult to comb through later.
Step 4: Cleanse and finger comb the hair. Use your fingers only and not any brushes or combs to gently work the shampoo through the length of your hair. Try to gently detangle a little bit as you go. You want to start the detangling process while you have product in your hair, so that even if it’s not all the way knot-free before rinsing, you can at least run your fingers through larger sections.
Step 5. Massage as you rinse. Once you’ve worked the shampoo through to the ends, it’s time to rinse. How you do this is equally as important as how you applied and worked it through. Rub your hands all the way from root to tip as water flows through your hair. This will ensure that all of the shampoo gets out, and your hair is ready for your conditioner. You don’t want any shampoo residue to get in between your strands and the conditioner or detangling cream you’ll be applying next.
Step 6. Follow with conditioner. You knew this was coming. Cleansing and conditioning go together just as perfectly as any dynamic duo ever has. After washing out all of your shampoo, apply your conditioner. It’s best to stick with a conditioner that coordinates with your shampoo—aka one that’s part of the same hair care system—instead of mixing and matching. Apply the formula to your hair, focusing it on the mid-lengths to ends rather than your roots. Let your conditioner sit for the designated amount of time—probably between two and five minutes—then rinse it out with cool water.
Step 7. Use a leave-in. Squeeze any excess water out of your hair to prep it for a leave-in conditioner. Pick one based on what your hair needs. Does your hair need a boost of definition? Is it dying for more moisture? Are you trying to fight off frizz before your hair dries? Choose wisely!
Step 8. Dry your hair. Don’t want to leave your hair sopping wet? We get it. To soak up a little bit of the water, use a soft cotton T-shirt to gently dry your hair. This will be more gentle than a terry cloth towel. If you’re in a rush, you can break out your blow-dryer, but make sure to use heat protectant, and we’d recommend reading up on our previous blog “Air Drying vs Diffusing”, first.
When Should You Wash Natural Hair?
Aside from the frequency, it’s also important to note the best time of day to wash your hair. Of course, this tip is merely a suggestion, but it could impact the long term health of your hair. Hair is most fragile when wet, so you typically want to avoid sleeping on wet hair. Knowing that, you should give hair enough time to air dry—before you go to bed—if you prefer to style it without heat. Even with a protective bonnet or satin pillowcase, any bit of friction against damp or wet hair may lead to breakage and frizz. For this reason, many people with natural hair prefer to wash their hair in the morning to give it plenty of dry time.
You should also take note of your hair’s porosity. This will determine things like how long it takes your hair to dry and even plays a part in how your hair absorbs and retains moisture when you wash it. With that, check out our “What’s Your Hair Porosity?” blog!
How Often Should You Condition Natural Hair?
Once you know the answer to how often you should cleanse natural hair, it only fits that you ask how frequently your hair should be conditioned. And believe it or not, there is such a thing as over conditioning your hair. Of course, soft, moisturized strands are the goal, but using too much conditioner, deep treating it too often, or leaving a conditioner on for longer than the recommended time frame can leave hair limp and fragile. Determining when to lay off with conditioning shouldn’t be too hard. You’ll be able to tell pretty easily if your waves, curls or coils look lifeless or if you’re having a hard time getting your hair to hold a style. If this happens, you’ll need a product with Protein in it to help Balance your Moisture level.
To get your hair on a better conditioning routine, try using a conditioner on a weekly basis. Weekly treatments with a natural hair conditioner are ideal for all curl types. If your hair is drier, you can amp by adding hair masks or a deep conditioner on a bi-weekly basis. For finer hair or strands that are not typically super dry, you can cut back to using the deep treatments once a month, but stick with the regular conditionings with a light leave-in formula.
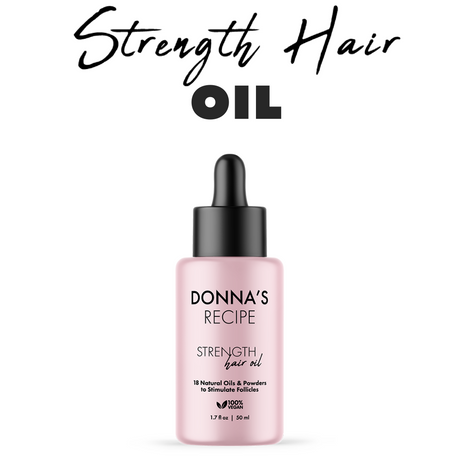
Take note of how you condition as well. We touched on this a little, but the point of the conditioner is to replenish moisture, rebalance, and help seal in water from washing your hair. There’s no need to apply conditioner to your scalp, even if it tends to be dry. There are other products such as Donna’s Strength Hair Oil that you can use at the styling phase to help soothe a dry scalp. Even super coily and dry strands don’t need conditioner at the roots, instead, apply it from the mid-shaft down to the ends of hair. Remember, natural hair especially needs the most moisture at the tips, so focus the application there.
Share how you cleanse and condition your hair on social media using the hashtag #DonnasRecipe! Feel free to follow and tag us on @DonnasRecipe to be featured!
Raise your hand if you are a product junkie. What is a product junkie you may ask? Look in the cabinet of anyone in the natural hair community, and if you find dozens of products, such as clarifying shampoos, moisturizing shampoos, conditioners, deep conditioners, masks, styling puddings, gels, curl creams, co-washes, oils, and anything in between…that my friend is a product junkie. My product shelf used to be loaded with ALL KINDS of hairstyling products, you name it.
Now you may be wondering, what were all of those products I just named? Or what are they all for? It’s very common in the natural hair community that one’s wash and go may only consist of a conditioner and some type of oil. That’s it.
Using only oils on your hair is not enough to keep your crown healthy and moisturized for the long haul (remember the hair grease days of the ‘80s and ‘90s?). Since it’s hard for natural hair to maintain moisture, you need to add a few more steps to your routine to get the job done.
Achieving the perfect wash day is often the compilation of many different products, and there are a few very beneficial and justifiable reasons for it.
Most products usually serve one or two specific purposes, as most wash days/styling require several elements, so using a variety of different products is often necessary.
Now let’s talk about some essential products for building a healthy hair regimen.
Every regimen shares a few essential components, and although your hair type and concerns may alter your hair care routine in some way, here are a few basic steps that every person can benefit from.
1. Cleanse
Cleansing is a balance between removing things like dirt, product residue, and dead skin cells without stripping the hair of its natural oils. Clarifying shampoos work to remove buildup from the hair - it’s like a reset button for your hair. On the other hand, a regular shampoo has mild cleansing agents with more emphasis on moisturizing your hair and making it shiny rather than clean. The trick is to alternate between the two, ideally using a good clarifying shampoo once a week to reset your hair and purify your scalp.
2. Condition
Conditioner is meant to stabilize the pH of the hair after shampooing. Conditioning benefits include moisturizing, added shine, detangling, and frizz reduction.
Deep Conditioner or Repair Mask: A deep conditioner, or a repair mask, can be used in place of a conditioner after shampooing. This is designed to be left on your hair longer, then rinsed out completely. These will not only stabilize the hair’s pH, but work to rebuild compromised protein structure, increase hair’s elasticity and enhance moisture retention overall. These products are especially great for chemically damaged or dry hair. Deep conditioners or repair masks should be used weekly on damaged hair and hair that is just beginning a new healthy hair regimen.
Leave-in Conditioner: A leave-in is meant to be applied after your hair is freshly shampooed and conditioned, and doesn’t need to be washed out. This will help further detangle, reduce frizz, and maintain moisture throughout the day. A leave-in conditioner is also designed to prime your hair before you begin styling.
3. Moisturize
To add further hydration and protection from dryness and breakage to the hair, you may want to use a styling cream that does everything from softening and defining to moisturizing and volumizing.
4. Seal
When it comes to oil, a little goes a long way. Oils can enhance your hair’s natural oils and lock in moisture and strengthen your hair strands. Donna's Recipe Strength Hair Oil is a dual hair and scalp oil to add shine, seal in moisture and help scrunch out the crunch for soft, defined and frizz-free curls.
5. Gel
These provide hold to your hair, from a light hold to a super strong one, depending on the product you use. Gels can also hold in moisture, enhance and define curls and control frizz.
6. Treatments
Scalp treatment: An exfoliating scalp treatment can unclog follicles, stimulate circulation and calm issues like scalp itchiness.
Protein treatment: Frizzy or damaged hair may need an extra boost from protein. These monthly treatments fill in gaps/holes in the cuticle, strengthening and smoothing strands. Experiment to find the one that works for you.
7. Tips
I know it sounds cliché, but consistency is key.
You’re not going to notice dramatic results overnight — although the effects of masks and certain styling products can be noticed instantly, it takes time for your hair to get used to new products.
When it comes to the frequency of use with products, it’s best to consult a professional. There are no hard rules for how often you should use each product. For example, some people wash their hair three times a week, while others wash only once a week. And some do it even less. When in doubt, ask a professional for personalized advice targeted to the products you use and the needs of your hair.
Your individual hair needs will naturally change over time. There’s a saying that hair changes texture every 7 years. Unlike most of the rumors floating around the internet, this one does have an element of truth behind it. Noticing these changes and responding appropriately can keep your hair looking healthy.
A good rule of thumb is to swap products as the seasons change. In the summer months, you may want to choose more lightweight and anti-frizz formulas to help hair in the face of humidity. As the winter months arrive, you may need to opt for products with extra hydrating properties.
Which products are in your hair care regimen? Share with us below.
Yes hun, we see you in your fresh Faux Locs, Box Braids and even your Butterfly Locs. And wait, you even have your baby hair laid! You go girl! Now I know you may be thinking, “I am not messing my braids up so, I am going to hold out as long as I can before washing it”. News Flash! Skipping and holding out washing your braids can reverse the benefits of you having braids in the first place.
We tend to get braids due to the seasons, convenience, versatility, low maintenance and of course to protect our natural hair. Keep in mind your goal is to give your hair a break and allow it to experience growth. Washing your hair in a protective style should not be a chore but a cherished moment. If you dread washing your braids, keep these tips in mind.
Remember, it is all about the scalp. Your scalp health is everything! Just because your hair is braided does not give you license to skip washday. There is no better time to take care of your scalp than when it is in a protective style. Why? Because your scalp is exposed, unlike when you do not have braids, you have direct access to your scalp and hair follicles.
Wash your braids every two to three weeks. Waiting longer can cause a stressed scalp, which can lead to build-up of products, sweat, dirt, dandruff, dead skin cells, and bacteria that clogs your pores causing pimples on your scalp. (Are you heading to the shower to wash your hair?)
In addition, when we have buildup on the scalp, it also leads to itchiness. Moreover, where there is an itch…we scratch or pat. Doing so also leads to a stressed scalp causing it to become inflamed and painful.
Keep in mind when you wash your braids, you do not have to use expensive products. More than likely your brains are synthetic. Concentrate on using your more expensive hair products on your scalp where it is needed. If you find your braids are dull, dusty or look damaged, using an inexpensive “all in one” shampoo and conditioner will do just fine.
The best product to use while your hair is in its protective style, is “Water”. We all know that warm water on your scalp will make your toes curl. Every now and then, while in the shower let the warm water hit your scalp. Gently message your scalp and rub your braids. This will rinse away the daily dust and dirt.
Keep your scalp healthy by using Donna’s Recipe Hair Oil daily especially in between wash and rinse days.
Even with proper care, most people tend to keep this style for about six to eight weeks. To keep your protective style last awhile make sure to cleanse, care for, and dry your braids regularly. So on your self-care days while you are exhaling allow your scalp to breathe and exhale too.
Air-drying and diffusing are the two main hair drying techniques for people with naturally textured hair. Another drying approach you may have also heard rumors about, or even experimented with, is plopping. What is plopping you may ask? Plopping is a heatless and simple way of drying wavy, curly, and naturally textured hair hair and can be used by anyone who may have thick, fine, long, or short hair.
What is Plopping?
Plopping is a great method to dry your hair as it helps encourage definition and prevents frizz. Plopping also reduces the need or urge to touch your hair while it dries since they are wrapped up in a microfiber towel or cotton t-shirt. Another benefit is that it can also cut down on drying time, especially for those with long or thick hair that tend to retain more moisture because of their length and density. Plopping can also benefit those who have finer or looser textures to create more definition since their hair is being scrunched up and creates lift at the root while they dry.
How to Plop Wavy, Curly and Textured Hair
If you were unaware, terry cloth towels are not ideal for anyone who has naturally textured hair because the rough material can cause frizz. Therefore, it’s highly recommended plopping with a microfiber towel or cotton t-shirt. These materials will be gentle on your hair and will help absorb excess moisture.
Step 1: Once your hair is freshly cleansed, conditioned, and styled, squeeze out any excess water so your strands are damp but not soaking wet anymore.
Step 2: Lay the microfiber towel or t-shirt flat out on your counter or bed. Lay it down on your preferred surface with the tail of the towel or end of the shirt facing down.
Step 3: Bending at your waist, flip your hair forward and place your hair at the center of the microfiber towel.
Step 4: While your head is still facing downward, grab the piece of the towel that is behind your head and pull it up and over your head so it lands at the nape of your neck. Wrap and tie the extra fabric of your microfiber towel behind your head. Your hair should fall in a mound at the top of your head.
Step 5: And Voila! Finish drying your hair while plopping! You can even go to sleep while you plop so when you wake up the next day your hair will be dry, defined and frizz free!
Step 6: Once you take the plop down, add some of Donna’s Recipe’s Hair Strength Oil into your palms. Scrunch your hair to break any remaining gel cast and fluff your hair at the root.
Are you new to plopping or have you tried it before? Let us know below!
One of the biggest struggles for us curly and coily heads is figuring out the right protein moisture balance. Conquering this mixture balance is important so that your hair isn’t weighed down or overly fragile.
NATURAL HAIR AND PROTEIN MOISTURE BALANCE
Curly hair is naturally dry, considering the way it grows from the scalp. The strand automatically curls rather than falling straight. This makes it harder for the natural oils on our scalp to travel down the hair length and keep the hair moisturized. That’s why moisture is absolutely key to healthy, juicy curls.
However, protein cannot be neglected. Our hair is made of 90% protein, which gives it strength and structure. Protein in our hair is broken down on a daily basis, so if we don’t restore what was lost, our hair will become weak and fragile.
DOES MY HAIR NEED PROTEIN OR MOISTURE?
In order to keep your hair healthy, you consistently need to maintain a balance of both protein and moisture. Make sure you drink plenty of water and eat enough protein-rich foods to create the right foundation for healthy hair growth.
Everyone’s hair is different, so a balanced protein moisture routine will depend on your hair porosity. The more porous and damaged your hair is, the more protein-rich products you should use.
IS MY CURRENT ROUTINE BALANCED?
Since we all have different needs in terms of protein and moisture, you might be wondering if your current routine is balanced enough or if you are adding too much of one or the other. Well Guess What?? There is an easy test that helps you figure out your hair elasticity, which is a great indicator of protein or moisture overload.
Take a strand of clean and dry hair end and gently pull at the sides:
If your hair stretches gently and bounces back, you are well balanced.
If the hair doesn’t stretch, or even snaps and breaks, you are in protein overload.
If the hair keeps stretching without bouncing back, and eventually falls apart, you are in a moisture overload.
HOW TO RESTORE A PROTEIN MOISTURE BALANCE
Depending on whether you are suffering from protein overload or moisture overload, you will need to use different products. However, a healthy hair journey begins with removing and product build up and resetting the hair. So make sure to balance between a clarifying shampoo and a moisturizing shampoo every other wash.
With fixing a protein overload, you’ll want to focus on protein-free products that will help restore your hair’s moisture. So try using a moisturizing deep conditioner to achieve ultimate hair hydration. Moisture overload requires using protein-rich products that focus on strengthening the hair, so look for conditioners, deep conditioners or masks that include protein ingredients.
One of the most frustrating things for us with curly and coily hair is when we simply can’t find a hairstylist that knows and understands our hair texture. Who agrees? For us with natural hair, it’s often normal to occasionally want a protective style like braids, twists, locs or wigs. While there are other moments where we want to rock our natural hair bold, proud and well deep conditioned. If you’ve recently gone natural, moved to a new city, or just need a change, trying to find a new natural hair stylist can be quite overwhelming. First, take a moment to breathe, cousin! If you’re not sure where to start, or if you’re feeling stuck, here are a few tips on choosing your natural hair stylist.
Referrals:
The oldest trick in the book to find business owners for practically everything. So, ask for your friends, family members, people you follow on social media, or neighbor for a referral. Don’t be shy when you see someone at the grocery store with really nice and neat braids or with big voluminous curls. That’s your opportunity to add someone in your referral book.
Social Media:
Social media platforms like Instagram or Facebook have been proven worthy multiple times when looking for a specific hair stylist. They’re basically databases for available goods and services. Search tags such as #naturalhairstylist #naturalhaircare #braidscityname #yourcitynaturalhairstylist etc. You might find several options in your area. Be careful, as not all hairstylists are alike. Do your research and make sure that the hair stylist has experience taking care of naturally curly or hair like yours.
Use a Natural Hair Stylist Directory
If you hop on Google, and search natural hair stylist directory, it’ll provide a more filtered database in your city. These directories are filled with hair stylists that specialize in natural hair care, protective styles, or healthy options for coloring curly hair. These are helpful ways to help connect people with coily/curly hair with hair stylists in their area.
Schedule a Consultation
Before scheduling an appointment, be sure to set up a consultation. Some stylists may offer this service for free while others may charge a small fee or deposit. Either way, a consultation is crucial when finding a natural hair stylist. Use this as an opportunity to discuss your hair’s needs, hair goals, and receive any feedback from the stylist regarding your healthy hair journey. This conversation will help you decide if a stylist fits your needs, budget, and overall confidence.
Talk About Products
Figure out what salons and stylists use the same or similar product lines as you. Find out if they have the styling tools that work best for your hair texture. If a particular salon doesn’t have the tools or products that are more centered for natural hair care, then they may not be the right fit for you.
Try a Few Stylists Before Committing
So you did all your research, booked a consultation, set an appointment and got your hair done. Everything went smooth but you’re still not 100% sold. That’s okay! There’s no rule that says you have to commit to one stylist after the first appointment. Try a few other hair stylists in your area over the year to see who you’re comfortable with and who works with your hair best. Because that’s what’s most important! If you love how your hair is done the first time, don’t feel the need to shop around. Continue booking with that stylist again and start building that relationship.
You’re looking in the mirror and you know something just isn’t right. Where did your lovely curls and your natural curl pattern go?!
This is the moment that you realize it's the result of repeated flat ironing, blow-drying, perm after perm, dyeing, and bleaching. Your curls that were once defined, bouncy, and happy are now stringy, limp, and lifeless – almost like they forgot how to curl!
Now you’re wondering, “How can I undo all this damage? How can I get my curl pattern back?”
Well, the truth is – you can’t jump in a time machine and travel back to its original state of health. What you CAN do is restore its strength and train your new growth coming in.
First and foremost, the most important step to embracing your natural curls is to make the decision that you want to commit to loving your curls no matter what. Applaud yourself and give yourself credit for having the courage to do this!
1. Avoid heat, please!
Burnt hair can’t be restored or repaired. The only solution for excessive heat damage is the growth of new hair. So, put the heat-styling tools down, right now! Or simply just throw them away.
For drying your hair:
Instead of a blow-dryer, use a microfiber towel or cotton t-shirt. It will remove excess water from your hair without irritating or drying out your strands.
If possible, try to air-dry your hair after using the microfiber towel.
A good air-drying tip is to add leave-in conditioner, styling cream/gel and Donna’s Hair Strength Oil to your damp hair, quickly do your hair in a protective style or wash & go, and let it dry while retaining moisture.
2. Physically train your curls when styling
If you're transitioning, more than likely, your ends don't resemble your natural hair texture or curl pattern of your roots. Therefore your ends need to be trained to curl and spring up again. When it's time to style your hair, finger coil and scrunch each loc of hair. Yes, it may be time consuming, but this will subconsciously tell your curls they need to start curling up again. They won't curl back immediately, but they will naturally make it a habit to curl on your own in due time!
3. If you must use heat – do so wisely.
Limit how often you use heat and when you do, use the lowest and coolest setting possible. If you must use a blow-dryer, flat iron, or other heat styling tools, remember to ALWAYS use a heat protectant. A heat protectant forms a protective layer around each of your strands guarding the cuticle from extreme heat.
Another helpful tip is to avoid using heat-styling tools on your wet hair. Water molecules can absorb a lot of heat, so frying your strands from the inside will cause all the moisture to evaporate. Make sure your hair is only damp (not soaking wet) before you turn that blow dryer on (if you MUST).
4. Give your hair a deep conditioning boost.
Whether you lost your curl pattern to damage caused by heat or chemical processing, moisturizing your hair is and will always be key. The best way to do that is with weekly deep conditioning.
Deep conditioners or hair masks are excellent ways to hydrate and moisturize your strands, scalp, and follicles. They also are nutrient-rich to help boost hair health.
To ensure you get all the goodness from your deep conditioner, consider using a clarifying shampoo before deep conditioning. This will help to remove buildup so your deep conditioner can actually get to your scalp and cuticles to work its magic. Damaged hair tends to be dry and brittle, so use a leave-in conditioner to hydrate and moisturize your hair on a daily basis.
5. Lay off the dyes, bleaches, and relaxers for a while.
At this point, coloring, highlighting and chemical straightening your hair should take a back seat. Your hair can’t take more manipulation. Dyes and bleaches are notorious for damaging and weakening your hair. Relaxers chemically change the structure of your stands, therefore changing your curl pattern.
If you still choose to color your hair, at least avoid any color that will require you to bleach your hair. Instead, go with a tone that matches your natural color to avoid bleaching.
Finally, transitioning your hair back to its natural curl pattern will take time, patience and LOVE! Use this journey as a way to get to know your hair type and texture better. Take the time to find out which styles and products work best for your hair. Develop a hair care routine that helps you nourish your strands into thicker, healthier hair as you proudly show off your natural curl pattern!
Have you ever been to a salon and your stylist or their assistant are giving you the most amazing scalp massage? You close your eyes and it feels like heaven here on Earth. There is a reason you feel so good. Let's first talk about why a consistent scalp massage is important and then we will get into the how.
Back to feeling like heaven on Earth when your stylist gives you a scalp massage at the washing bowl.
A scalp massage is beneficial not just for your scalp but your entire body.
Scalp massages releases the natural chemical, serotonin in your body which relaxes you and puts you in a better mood. It is a great way to relieve built up stress as well.
Scalp massages encourage good blood flow helps lymphatic drainage
You may notice yourself or people thinning at the crown of the head first. It is because it is the top of the head where the blood is highest to reach. With a massage, it gets the blood flowing to the places it needs. Using active ingredients such as menthol and peppermint stimulate the scalp best and stimulate the follicles. Other oils such as rosemary, tea tree and jojoba are great with awakening the skin and promoting a healthy scalp for growth production. Donna's Recipe Strength Hair Oil or the nut free version consist of all natural essential and carrier oils to promote a healthy scalp.
Now let's get to the proper ways to do a scalp massage:
There are 2 common ways you can massage:
1. Effleurage which is most common which involves circular, stroking movements.
and
2. Petrissage which is a process of gentle kneading and lifting of the scalp.
Both are beneficial to a relaxing, beneficial massage for the scalp.
One way to really ensure to get the blood flowing to the scalp is massaging doing the inversion method. Below is a quick guide on how to massage your scalp doing the inversion method.
Inversion Method
First, stimulate your hair follicles with Donna's Recipe Strength Hair Oil or Nut Free Version Hair Oil:
Use doppler to apply on fingers or directly on scalp. Apply the oil only to your scalp. A little goes a long way so you won't saturate your hair with the oil.
Massage with light pressure in circular motions on your scalp for 3-5 mins. Start the front of your head and work your way to the sides and lastly to the back. Avoid pressure on sensitive areas. Be careful not to tangle hair with your fingers.
Then , hang your head upside down to increase blood to flow to your scalp:
Bend over standing (advanced) or sit in a chair and spread your legs apart and flip head between your legs down.
Use your hands to flip all of your hair forward so it’s hanging upside down.
Hold this position for 4 minutes and massage scalp in circular motions.. If you begin to feel dizzy, weak, or any other discomfort, stop and bring your head up slowly..
Sit up, raising your head slowly to avoid a head rush or dizziness..
Repeat daily for one week each month.
Don't do the inversion method if you have heart issues, back pain or high blood pressure.
IMPORTANT TIPS TO LEAVE YOU WITH:
-A good scalp massage is good for the entire body- relieves stress and mood stabilizer
- Massaging for 3-5 mins a day is great for blood flow which can encourage a healthy scalp and stimulate growth.
-Accelerate the blood flow by trying the inversion method a week every month
Share some useful scalp massage tips you've discovered on your hair journey in the comments section.
Oh baby, the edges!! Yes! They are often the shorter hairs that go around our hairline and while they are shorter...they often get the most attention. Many people ask, "How do you grow your edges??", "How do you style your edges?", "How do you care for your edges?"
Edges are a very important topic of discussion, right?!
Today let's discuss edges and how to grow them back.
The edges are often the most vulnerable and need more TLC than the other parts of hair on your scalp. Let's quickly go through some common causes of the dreaded thinning of our edges.
Food Intake
Now you know this was coming! We have to be mindful of what we are getting at the grocery store. To start, check out the 5 Hair Friendly Foods Blog to get you started. A good place to be to help strengthen our edges is the produce section with lots of dark green leafy foods. Think of eating the rainbow. Greens (kale, spinach), Orange (carrots), Yellow (Squash), Purple (eggplant) etc. These are the foods that will give life back to our edges. Also, taking supplements such as Donna's Recipe Biotin Gummies are great addition to support promotion of edge growth.
Hair Styles that Pull the Edges
Anytime your edges are pulled, it is causing tension and making our edges susceptible to breakage. For a little while, Donna's cousin can take a slicked down hairstyle but for many weeks and months is a big no no from our baby hairs. They said they just don't like being pulled like that. Try low manipulation styles where the baby hairs can be slicked down but not PULLED especially long periods of time...longer than a night out.
Medical Conditions
Anemia, postpartum shedding, low Vitamin D levels, alopecia to name a common few are all conditions that can take a toll on edges and other parts of hair on the scalp. It is important to consult with a healthcare professional to help with solutions for the hair loss in edges.
Unhealthy Products
It is important to look at the ingredients of products that are going to go on your precious scalp and hair. Products such as synthetic fragrances and alcohols are not good for the edges.
Stress
This is a big cause of hair loss and usually the edges are the first to go when we experience stress. This past year has caused so many of us stress we could definitely do without.
Now, lets get to the SOLUTION part. What can we do to grow these edges back. Our edges help us to create the beautiful styles that we love.
Switch up your Styles
Sometimes we like a style, particularly a protective style and opt for the same style because it works. It's best to switch it up so the hair isn't being manipulated in the exact same spot. Switch up your styles and give it a rest if needed.
Out with the Cotton, In with the Satin
Cotton pillowcases are my favorite but a good satin pillowcase will ensure the edges aren't getting caught in the material or rubbing against the cotton fibers. A satin pillowcase allows the hair to glide along without disruption. Same goes for cotton towels, opt for a microfiber towel on wash day.
Massage those Edges
It's a great idea to give your hair daily TLC with a 5-10 min massage. Even if its 2-3 mins. it will stimulate the follicles to "wake up" and flourish... aka grow out our scalp. Our Donna's Recipe Strength Hair Oil or the Nut Free Version Donna's Recipe Strength Hair Oil will do great combined with massage to stimulate the follicles.
Talk to a Dermatologist
A good dermatologist will determine what condition you have and can guide you on a journey to recovery of your edges and other hair loss. It is best to seek out a dermatologist that has experience with your hair type as well. It's best to ask for referrals from people who have had success with a good dermatologist. You can also search on social media in your area to get a more intimate experience with a qualified doctor.
Be Mindful
It's a saying, "Think what you're thinking about." When anxiety and stress starts to attack, begin to be mindful of that and redirect to a place of peace. Think about 3 things that will make you smile instantly. It could be giving birth to your child, reminiscing of your first kiss, laughing with your mother. Think on these things...yes!! Very good! Also, getting out with nature is another way to relieve or avoid stress. Sun is a happy drug. Get out in the sun and soak up that Vitamin D. These are things that can cause a side effect of growing these edges back!
These are just a few ways to encourage growth back to our edges. We're on this healthy hair journey and so it's vital for us to be well and our hair will follow suit. Join or continue with us on this healthy hair journey with Donna's Recipe. Love you!! Have yourself the most amazing day and even if you can't don't you dare go messing up nobody else's!