Much like many other natural hair tips and advice, how to wash natural hair isn’t one-size-fits-all. That means there isn’t a singular answer when someone asks, “How often should you wash your hair?” In all honesty, the frequency of your wash days depends on your shampoo, personal preference, and the state of your natural hair. With that said, there’s a strong chance that you should be cleansing more often than you have been—or at least think you should be.
It’s very common and understandable to have hesitancy about overwashing natural hair. It’s the driest of the bunch, which makes it a lot more prone to damage, breakage, and curl pattern changes. However, there’s one big takeaway that those with natural hair need to remember: Water is your friend. It’s all about balance, and with the right hair care products and hair washing routine, you can absolutely make the most of each wash day. Here’s what you need to know.
How Often Should You Wash Natural Hair?
Although there isn’t an exact science to figuring out how often you should wash your hair, since it depends on a few factors. To determine how often you should wash your hair, consider how much product and the types of products you’re using on a regular basis.
Wash your hair once a week if … your hair requires heavier oils, gels that might flake after a few days, or hairsprays that leave hair stiff. This also may be what’s needed if you have an oily scalp. Piling product on top of the natural oils that your scalp produces, particularly if it’s in excess, can not only clog the hair follicle but also might lead to irritation, inflammation, itching, and in more severe cases, follicle damage or hair loss.
Wash your hair twice a month if … you add heat to style your hair with a diffuser to dry, a curling wand to define, or even if you blow dry your hair straight on a regular basis. When you add heat to style your hair, cutting the wash frequency back to every other week can be beneficial. Even if you’re using a heat protectant (which you absolutely should be), there may be some level of moisture stripping happening. When you do shampoo, use a moisture-boosting shampoo to help bring back any lost hydration.
Wash your hair once a month if … your hair is drier or if your scalp is more on the normal to dry side. Once a month shampooing will likely be an ideal step for you. Of course, you can always adjust if in between washes you’re feeling itchy or if you work out often and sweat a lot. Otherwise, weekly shampoos may better suit your active lifestyle to keep hair feeling and smelling fresh.
Should You Shampoo Natural Hair?
Contrary to popular opinion, natural hair needs shampoo. A lot of naturals are die-hard co-wash fans, and this is totally fine. However, a traditional shampoo is highly needed to help remove excess oil and product buildup, something a cleansing conditioner isn’t designed to do.
What Should You Use To Wash Natural Hair?
No matter your hair type, curl pattern, or the current state of your hair, what’s most important is the type of hair shampoo you use. Sulfate-free shampoo is key as it will give your hair and scalp the necessary cleansing to keep it strong and growing, without stripping any natural oils.
How Should You Wash Your Hair?
This may seem unnecessary, but there’s actually a method to washing, especially if you’re shampooing natural hair. This will ensure that you keep your hair from getting damaged and help eliminate frizz when you get to styling. Here are our hair washing tips.
Step 1: Check your water temps. Much like skin, hot water can dry hair out. Yes, we know it feels luxurious to run hot water through your hair, but the heat can strip your hair of essential oils. Wash with lukewarm or room temperature water instead, and finish with a cool rinse.
Step 2: Portion out the shampoo. Have you ever wondered, “How much shampoo should I use for my hair?” Well, let me tell you: You shouldn’t just squeeze a sizeable amount of product onto your locks and hope for the best. Pour shampoo into the palm of your hands and not directly onto hair. This will ensure that you’re doling out the right amount and not overdoing it.
It’s better to start with a smaller amount of product (about a golf-ball-size) through your hair and add more if needed, rather than to douse your head with it. It’s unnecessary. Shampoo should primarily be applied on your scalp and not the length of your hair (more on that in a minute), if you’re used to coating every inch of your strands, you may be accustomed to washing with way too much of your favorite hair shampoo.
Want to know what’s also unnecessary? That whole lather, rinse, repeat deal. We’ve already gone over that you likely don’t need to wash your hair more than once a week—you definitely don’t need to lather up multiple times during the same shower.
Step 3: Work through your scalp. Start by massaging the shampoo into your roots. You want most of the product to be concentrated on the scalp as that’s where the majority of buildup, dirt, and oil usually sits. Work the product around the scalp in a back and forth motion. Not in circles! This will tangle your hair and make it more difficult to comb through later.
Step 4: Cleanse and finger comb the hair. Use your fingers only and not any brushes or combs to gently work the shampoo through the length of your hair. Try to gently detangle a little bit as you go. You want to start the detangling process while you have product in your hair, so that even if it’s not all the way knot-free before rinsing, you can at least run your fingers through larger sections.
Step 5. Massage as you rinse. Once you’ve worked the shampoo through to the ends, it’s time to rinse. How you do this is equally as important as how you applied and worked it through. Rub your hands all the way from root to tip as water flows through your hair. This will ensure that all of the shampoo gets out, and your hair is ready for your conditioner. You don’t want any shampoo residue to get in between your strands and the conditioner or detangling cream you’ll be applying next.
Step 6. Follow with conditioner. You knew this was coming. Cleansing and conditioning go together just as perfectly as any dynamic duo ever has. After washing out all of your shampoo, apply your conditioner. It’s best to stick with a conditioner that coordinates with your shampoo—aka one that’s part of the same hair care system—instead of mixing and matching. Apply the formula to your hair, focusing it on the mid-lengths to ends rather than your roots. Let your conditioner sit for the designated amount of time—probably between two and five minutes—then rinse it out with cool water.
Step 7. Use a leave-in. Squeeze any excess water out of your hair to prep it for a leave-in conditioner. Pick one based on what your hair needs. Does your hair need a boost of definition? Is it dying for more moisture? Are you trying to fight off frizz before your hair dries? Choose wisely!
Step 8. Dry your hair. Don’t want to leave your hair sopping wet? We get it. To soak up a little bit of the water, use a soft cotton T-shirt to gently dry your hair. This will be more gentle than a terry cloth towel. If you’re in a rush, you can break out your blow-dryer, but make sure to use heat protectant, and we’d recommend reading up on our previous blog “Air Drying vs Diffusing”, first.
When Should You Wash Natural Hair?
Aside from the frequency, it’s also important to note the best time of day to wash your hair. Of course, this tip is merely a suggestion, but it could impact the long term health of your hair. Hair is most fragile when wet, so you typically want to avoid sleeping on wet hair. Knowing that, you should give hair enough time to air dry—before you go to bed—if you prefer to style it without heat. Even with a protective bonnet or satin pillowcase, any bit of friction against damp or wet hair may lead to breakage and frizz. For this reason, many people with natural hair prefer to wash their hair in the morning to give it plenty of dry time.
You should also take note of your hair’s porosity. This will determine things like how long it takes your hair to dry and even plays a part in how your hair absorbs and retains moisture when you wash it. With that, check out our “What’s Your Hair Porosity?” blog!
How Often Should You Condition Natural Hair?
Once you know the answer to how often you should cleanse natural hair, it only fits that you ask how frequently your hair should be conditioned. And believe it or not, there is such a thing as over conditioning your hair. Of course, soft, moisturized strands are the goal, but using too much conditioner, deep treating it too often, or leaving a conditioner on for longer than the recommended time frame can leave hair limp and fragile. Determining when to lay off with conditioning shouldn’t be too hard. You’ll be able to tell pretty easily if your waves, curls or coils look lifeless or if you’re having a hard time getting your hair to hold a style. If this happens, you’ll need a product with Protein in it to help Balance your Moisture level.
To get your hair on a better conditioning routine, try using a conditioner on a weekly basis. Weekly treatments with a natural hair conditioner are ideal for all curl types. If your hair is drier, you can amp by adding hair masks or a deep conditioner on a bi-weekly basis. For finer hair or strands that are not typically super dry, you can cut back to using the deep treatments once a month, but stick with the regular conditionings with a light leave-in formula.
Take note of how you condition as well. We touched on this a little, but the point of the conditioner is to replenish moisture, rebalance, and help seal in water from washing your hair. There’s no need to apply conditioner to your scalp, even if it tends to be dry. There are other products such as Donna’s Strength Hair Oil that you can use at the styling phase to help soothe a dry scalp. Even super coily and dry strands don’t need conditioner at the roots, instead, apply it from the mid-shaft down to the ends of hair. Remember, natural hair especially needs the most moisture at the tips, so focus the application there.
Share how you cleanse and condition your hair on social media using the hashtag #DonnasRecipe! Feel free to follow and tag us on @DonnasRecipe to be featured!
Raise your hand if you are a product junkie. What is a product junkie you may ask? Look in the cabinet of anyone in the natural hair community, and if you find dozens of products, such as clarifying shampoos, moisturizing shampoos, conditioners, deep conditioners, masks, styling puddings, gels, curl creams, co-washes, oils, and anything in between…that my friend is a product junkie. My product shelf used to be loaded with ALL KINDS of hairstyling products, you name it.
Now you may be wondering, what were all of those products I just named? Or what are they all for? It’s very common in the natural hair community that one’s wash and go may only consist of a conditioner and some type of oil. That’s it.
Using only oils on your hair is not enough to keep your crown healthy and moisturized for the long haul (remember the hair grease days of the ‘80s and ‘90s?). Since it’s hard for natural hair to maintain moisture, you need to add a few more steps to your routine to get the job done.
Achieving the perfect wash day is often the compilation of many different products, and there are a few very beneficial and justifiable reasons for it.
Most products usually serve one or two specific purposes, as most wash days/styling require several elements, so using a variety of different products is often necessary.
Now let’s talk about some essential products for building a healthy hair regimen.
Every regimen shares a few essential components, and although your hair type and concerns may alter your hair care routine in some way, here are a few basic steps that every person can benefit from.
1. Cleanse
Cleansing is a balance between removing things like dirt, product residue, and dead skin cells without stripping the hair of its natural oils. Clarifying shampoos work to remove buildup from the hair - it’s like a reset button for your hair. On the other hand, a regular shampoo has mild cleansing agents with more emphasis on moisturizing your hair and making it shiny rather than clean. The trick is to alternate between the two, ideally using a good clarifying shampoo once a week to reset your hair and purify your scalp.
2. Condition
Conditioner is meant to stabilize the pH of the hair after shampooing. Conditioning benefits include moisturizing, added shine, detangling, and frizz reduction.
Deep Conditioner or Repair Mask: A deep conditioner, or a repair mask, can be used in place of a conditioner after shampooing. This is designed to be left on your hair longer, then rinsed out completely. These will not only stabilize the hair’s pH, but work to rebuild compromised protein structure, increase hair’s elasticity and enhance moisture retention overall. These products are especially great for chemically damaged or dry hair. Deep conditioners or repair masks should be used weekly on damaged hair and hair that is just beginning a new healthy hair regimen.
Leave-in Conditioner: A leave-in is meant to be applied after your hair is freshly shampooed and conditioned, and doesn’t need to be washed out. This will help further detangle, reduce frizz, and maintain moisture throughout the day. A leave-in conditioner is also designed to prime your hair before you begin styling.
3. Moisturize
To add further hydration and protection from dryness and breakage to the hair, you may want to use a styling cream that does everything from softening and defining to moisturizing and volumizing.
4. Seal
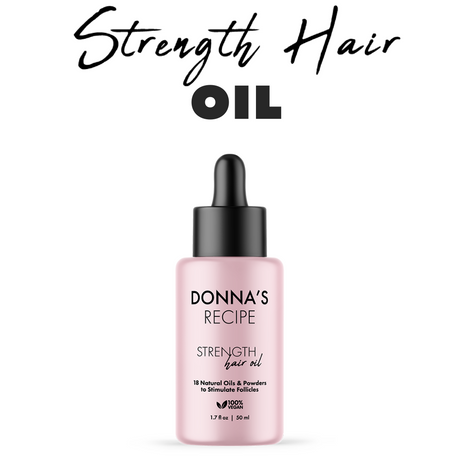
When it comes to oil, a little goes a long way. Oils can enhance your hair’s natural oils and lock in moisture and strengthen your hair strands. Donna's Recipe Strength Hair Oil is a dual hair and scalp oil to add shine, seal in moisture and help scrunch out the crunch for soft, defined and frizz-free curls.
5. Gel
These provide hold to your hair, from a light hold to a super strong one, depending on the product you use. Gels can also hold in moisture, enhance and define curls and control frizz.
6. Treatments
Scalp treatment: An exfoliating scalp treatment can unclog follicles, stimulate circulation and calm issues like scalp itchiness.
Protein treatment: Frizzy or damaged hair may need an extra boost from protein. These monthly treatments fill in gaps/holes in the cuticle, strengthening and smoothing strands. Experiment to find the one that works for you.
7. Tips
I know it sounds cliché, but consistency is key.
You’re not going to notice dramatic results overnight — although the effects of masks and certain styling products can be noticed instantly, it takes time for your hair to get used to new products.
When it comes to the frequency of use with products, it’s best to consult a professional. There are no hard rules for how often you should use each product. For example, some people wash their hair three times a week, while others wash only once a week. And some do it even less. When in doubt, ask a professional for personalized advice targeted to the products you use and the needs of your hair.
Your individual hair needs will naturally change over time. There’s a saying that hair changes texture every 7 years. Unlike most of the rumors floating around the internet, this one does have an element of truth behind it. Noticing these changes and responding appropriately can keep your hair looking healthy.
A good rule of thumb is to swap products as the seasons change. In the summer months, you may want to choose more lightweight and anti-frizz formulas to help hair in the face of humidity. As the winter months arrive, you may need to opt for products with extra hydrating properties.
Which products are in your hair care regimen? Share with us below.
Hey Family!
Remember those big dreams and plans you used to have way back when? Let’s talk about them. It’s so easy to get distracted or discouraged, especially when life throws endless curveballs your way or when we let the opinions of others in. Before you know it, you wake up one day asking yourself where did the time go and regretting the things you didn’t do. Maybe your confidence about pursuing these dreams have been shaken or maybe you feel it’s too late. Well, I want to remind you that as long as you still have air in your lungs, it’s never too late! Those dreams and plans can still be realized! It may look a little different now than it did back then and maybe you’ll have to tweak a couple things, but there’s still time.
One good thing that comes from being delayed is, you now have more wisdom and knowledge. You have fresh eyes and life experiences to see your dreams through. You may also have more access to resources. You don’t need to make it all happen in one go, but you do need to take just one step.
Grab a journal, and write that dream down.
I know from experience that looking at your entire dream can be overwhelming and anxiety inducing. So underneath your written dream, I want you to write one thing that you can accomplish in the next day(s), week(s), or within one month (don’t allow yourself to go beyond a month). It could be something as simple as making a phone call, doing some research, or assembling a team of trusted people - to something as big as applying for that loan, looking for a new job that will allow you the freedom to work on your dream, writing that manuscript, or starting therapy to figure out what’s stopping you from pursuing those dreams in the first place. Nothing is off the table. Once you’ve accomplished that first step, check it off, and write down another one.
Put that step on your calendar.
Give yourself a deadline and make it happen!
Find a trusted friend or mentor to hold you accountable.
If you have someone expecting an update from you, you’re more likely to make it happen. share your dream or plans, but make sure it is with someone who will encourage and push you. Someone who will believe in you.
Surround yourself with people who are where you want to be.
Watch the TedTalks, go to the conferences, or YouTube “how to”. Reach out to people on social media. If you can see it, you can absolutely achieve it.
Remember that every setback is a set up for something even better.
Don’t give up. Try again or attack from a different angle.
Lastly, HAVE FUN.
Your dreams should be something you enjoy doing - something you can be proud of that gives you purpose and your life meaning. It will be harder to accomplish them if you are dreading getting up each day to go after them. It won’t be easy, but it should be enjoyable.
Don’t be afraid to dream big. I’ve heard time and time again, “if your dreams don’t scare you, they aren’t big enough.” Aim high, because regardless of if you make it to what you envisioned or not, I promise you, you’ll be much further than where you are now. Be brave, tune out the naysayers and your negative inner dialogue. Affirm yourself, take a leap of faith, and start now.
What is one dream that you are committing to taking steps to actualizing? Let us know below! And once you complete your first step, come back and write “I Did It!”. See you on the other side of your dream cousins!
XO,
Ashley
Yes hun, we see you in your fresh Faux Locs, Box Braids and even your Butterfly Locs. And wait, you even have your baby hair laid! You go girl! Now I know you may be thinking, “I am not messing my braids up so, I am going to hold out as long as I can before washing it”. News Flash! Skipping and holding out washing your braids can reverse the benefits of you having braids in the first place.
We tend to get braids due to the seasons, convenience, versatility, low maintenance and of course to protect our natural hair. Keep in mind your goal is to give your hair a break and allow it to experience growth. Washing your hair in a protective style should not be a chore but a cherished moment. If you dread washing your braids, keep these tips in mind.
Remember, it is all about the scalp. Your scalp health is everything! Just because your hair is braided does not give you license to skip washday. There is no better time to take care of your scalp than when it is in a protective style. Why? Because your scalp is exposed, unlike when you do not have braids, you have direct access to your scalp and hair follicles.
Wash your braids every two to three weeks. Waiting longer can cause a stressed scalp, which can lead to build-up of products, sweat, dirt, dandruff, dead skin cells, and bacteria that clogs your pores causing pimples on your scalp. (Are you heading to the shower to wash your hair?)
In addition, when we have buildup on the scalp, it also leads to itchiness. Moreover, where there is an itch…we scratch or pat. Doing so also leads to a stressed scalp causing it to become inflamed and painful.
Keep in mind when you wash your braids, you do not have to use expensive products. More than likely your brains are synthetic. Concentrate on using your more expensive hair products on your scalp where it is needed. If you find your braids are dull, dusty or look damaged, using an inexpensive “all in one” shampoo and conditioner will do just fine.
The best product to use while your hair is in its protective style, is “Water”. We all know that warm water on your scalp will make your toes curl. Every now and then, while in the shower let the warm water hit your scalp. Gently message your scalp and rub your braids. This will rinse away the daily dust and dirt.
Keep your scalp healthy by using Donna’s Recipe Hair Oil daily especially in between wash and rinse days.
Even with proper care, most people tend to keep this style for about six to eight weeks. To keep your protective style last awhile make sure to cleanse, care for, and dry your braids regularly. So on your self-care days while you are exhaling allow your scalp to breathe and exhale too.
Cream? Gel? Or both? Or both? That is the question. Both of these hair care products are designed to cater towards natural hair needs. Several factors come into play when deciding which product to use for your hair, including density, width, curl pattern and the porosity of your hair. Choosing between a cream or a gel will depend not only on these factors, but also on your desired hair goals.
What are your desired hair goals?
Frizz control
Defined curls
Elongation
Hydration/Moisture
Volume
Extend a style
Let’s first talk about what each product does…
Creams
Creams, typically, are less of a styling product and more of a hair care product. They provide moisture, definition, and shine. They also help to keep hair healthy, eliminate frizz, and moisturize from the inside out. Creams are soft, light, and don't feel greasy or stiff when applied to hair. Creams also tend to have a lighter hold and soften your hair while giving volume, so if extending your hair style is what you’re looking for, try adding a gel.
Gels
Gels have come a long way since the crunchy-curl days of the ’90s and 2000s and have moved from merely providing hold to also providing moisture. Whether your hair is straight, curly or coily, gels are generally used to hold and set the hair. They provide shape and hold to a style by forming a film on the hair that creates physical bonds between hair strands, holding them in place, which helps create the clumping effect.
Pro Tip: Not all gels and creams will mix well together. Try experimenting on your hand first. Mix one pump of each product on your hand.
Here are signs that your products will work together:
Blends easily
Forms into one product
Milky or clear color
Feels smooth and creamy
Here are signs that the products don’t work together:
Blends easily Mixture has a thick, chunky texture
Separated and not blended
Mixture dries up
Consider What Your Curls Need
One of the best ways to go about this large task is to consider your hair needs.
Texture and Volume. Make sure you know your specific hair characteristics (porosity, density, curl pattern) so that you know how much product to use. After all, you want to add texture and volume to your hair, not weigh them down or obscure them.
Define, Extend a Style. For styles that are longer-lasting and moisturized, you will more than likely need a cream and gel.
Frizz. If it’s frizz that’s bothering you, then a gel and curl cream will allow you to go outside when it’s humid. This combination will make it easy to manipulate your locks and give them that perfect, soft finishing touch.
Hydration. The natural oil produced by your scalp (sebum) is supposed to travel down your hair to keep it moisturized and protected. The twists and bends in natural hair make that journey a long, difficult one. Sebum typically doesn’t make it to the ends of curls, making our hair feel more dry. If hydration is what your hair needs, go with a curl cream or defining butter. It is the perfect solution to hydrate the hair from the inside out.
Based on the information and tips that has been provided, you should now be able to decide whether you need to use the cream, gel or both. Have the most amazing day!
Hello there cousins! Having trouble growing your natural hair? Does everybody else seem to grow hair quicker compared to you? You're definitely not alone in your struggle. Many women and men have different hair textures that grow at different speeds. Some have hair that is even more inclined towards breakage and dryness, which totally impacts growth! It may seem hard, but we all can enjoy healthy hair growth. Our lovely cousin Arnita has put together a fun and simple list full of helpful tips for growing natural hair that you can try at home! With proper care, maintenance, and an excellent hair care routine, you can enjoy longer, stronger, natural hair. Here are some hair care tips to help you reach your hair growth goals:
Hey Family, Ashley here! It’s that time of the year again. The weather is warming up, spring is slowly rubbing her eyes awake, and after defrosting from the winter blues, you might have the urge to pack up and get out of town for a bit. It’s traveling season and one thing we cannot do, is assume you’ll find what you need for your hair texture while on your trip, especially if we’re talking international! For those of you who will be partaking this year, here are some must-haves to pack before take off, that will help protect your natural hair.
Shampoo and Conditioner
First up, we have the dynamic duo. Whether you’re hitting the pool, diving into the ocean, or hiking along a beautiful mountainside, you will need to wash your hair at some point (yes this goes for protective styles as well). The last thing you want is for chlorine or salt water to sit in your hair and dry your hair out. Yes, hotels provide shampoo and conditioner, but it’s usually not made for all hair types. So definitely pack your favorites or pour some into travel containers.
The Triple Threat
If you are taking a much longer trip, at some point your hair will need a refresher or rehydration. In this case, use the “Triple Threat”: leave-in conditioner, a hair butter or cream, and your favorite styling gel. You can mix the leave-in with water and use that to give your hair some much needed moisture. You could also do a full routine of washing your hair and applying your leave-in conditioner, cream or butter, and styling gel - in that order! After this, you can do single strand twists for a twist out look or rock your wash and go.
Hair Diffuser
Though many hotels and Airbnb’s offer a blow dryer for your use, they don’t always get the job done. Packing your own hair diffuser attachment would cut down on drying time. This is perfect for wavy to super coily hair textures.
Silk Scarf and Bonnet
These two items are a no brainer! Unless you want frizzy snagged strands in the morning, you better scarf and bonnet up. No matter your hair texture, many people believe this is an important step. Consider creating a pineapple updo (a high ponytail with your silk scarf wrapped around) and then place the bonnet over the remaining exposed hair. This way, you can double the protection without losing your scarf while you sleep.
Hair Pins
There will come a time on your trip when your hair will need pinning. If you only have a couple minutes to do something with your hair, pins are a must have. You can quickly do a low slicked back bun or pin your twists for your twist-out up into an elegant style for dinner on the beach, if you aren’t ready to take them out yet. Either way hair pins are essential.
Headwrap or Wig it!
At some point you may get tired of keeping up with your tresses. Being able to plop the wig on and snatch it off at the end of the day without worrying about much maintenance, was exactly a stress reliever. You can simply pack your wig in a suitcase for the trip. If wigs aren’t your thing, a great alternative is a beautiful headwrap. You can find so many creative videos online in the many ways you can style them. Just wrap and go!
Oil
Of course we can’t forget our Donna’s Recipe Strength Hair Oil! An oil is super important to seal in moisture after applying the Triple Threat mentioned above or just to keep your scalp healthy and protected from itching, flaking, and the elements. If you’re rocking a protective style, wig, or showing out your wash and go, make sure that at the end of each day you show your scalp some love by oiling it with Donna’s Recipe oil.
So if you’re looking to travel this season, whether you’re letting your natural hair do its thing, rocking braids, or wigging it - consider your activities, the length of time you’ll be on your trip, and be sure to check the weather in advance to make the most informed decision on what you should pack to protect your tresses. Happy and safe travels cousins!
Do you know you are one action or thought away from feeling happy? Yes! Happiness is an emotional state from having feelings of joy, satisfaction, contentment and fulfillment. If you woke up this morning not feeling happy ...honey, that's ok. We are going to change that....yes!!
Try out one of these happy hacks and let us know in the comments if you felt happiness after doing it. I already know but read on to pick which happy hack you're going to do.
1) Hug someone for a minute
Did you know hugging makes you happier? Well, if you didn't know, go ahead and give someone a long extended hug and you will see. It spikes our oxytocin levels.
Oxytocin is a chemical in our bodies that is also known as the “cuddle hormone”. This is because its levels rise when we hug someone. Oxytocin is associated with happiness and less stress. Let's cheer to that. A good hug is always good for the soul and heart.
2) Dance
Yes! Dancing makes you happy, honey! When we dance our brain releases endorphins, hormones which can trigger neurotransmitters that create a feeling of happiness, fun, peace and love. Music and dance invigorate the sensory and motor circuits of our brain. So, that's enough to get you up to turn on the music and dance! Come on!! Let's move!
3) Rub your pet
The touch between you and your pet can have therapeutic benefits for both of you all. In humans, petting a dog can trigger the release of the bonding hormone oxytocin. And we already, spoke about oxytocin and its benefits. Rubbing your pet's fur can also lower your heart rate and blood pressure. That's enough to take a break and rub your baby pet.
4) Make your bed
This simple action item can be overlooked but making your bed can improve your overall happiness and well-being. Making your bed can actually make you happier and more productive. It gives you a sense of accomplishment and improves your mood instantly.
5) Smile for 20 seconds
Smiling impacts the way you feel. This is not up for debate. It's only 20 seconds go ahead a smile for 20 seconds and guarantee you will keep smiling after the 20 seconds are up. Why is that? Because you have communicated to your brain that you are in a good mood and it followed suit. Yes, very good!
6) Put your favorite song on repeat
Listening to your favorite song gives you confidence because you know every word. It's also usually your favorite song because there are happy memories tied to that song. Allow your mind to go to that happy place by playing the song on repeat.
Now, there you go..six happy hacks that are quick to do. It will make you feel better in a pair of seconds. Go ahead and try one or more today and leave in the comments how you felt afterwards. Share this article with someone who this would help as well. Love you!
Remember to stay in stock of your Donna's Recipe. You know Donna doesn't play about our consistency.
You're doing it again !!!
One thing has gone wrong and here you go with "Don't nothing ever go my way!" One thing. Everything isn't going wrong.
You're just having a moment. It may be a speed bump because it's time to slow down. Maybe you're at a stop sign because it's time to look both ways before you keep going. But everything isn't going wrong. So stop that negative talk. Stop that tantrum. You're ok. Things are fine and recognize this is only a moment. Take a moment to pause, focus and say why did this happen? And what can I do to prevent it from happening again or to proceed with caution and figure it out. You got this!
Now, gone about your business and have yourself the most amazing day, but even if you can't don't you dare go messing up nobody else's!
Now, Donna don't want you stressing out and taking pauses on your Donna's Recipe. Are we still on this healthy hair journey together? Yes! Get into your Donna's Recipe!